Contactum supports integration with Cloudflare Turnstile, offering visitors a seamless, CAPTCHA-free experience. It helps prevent abuse and verifies real users without the privacy issues or poor user experience often associated with traditional CAPTCHAs.
This Article will walk you through setting up Cloudflare Turnstile on your WordPress site using Contactum.
Configuring CloudFlare Turnstile # #
To configure the Turnstile integration, follow the steps below –
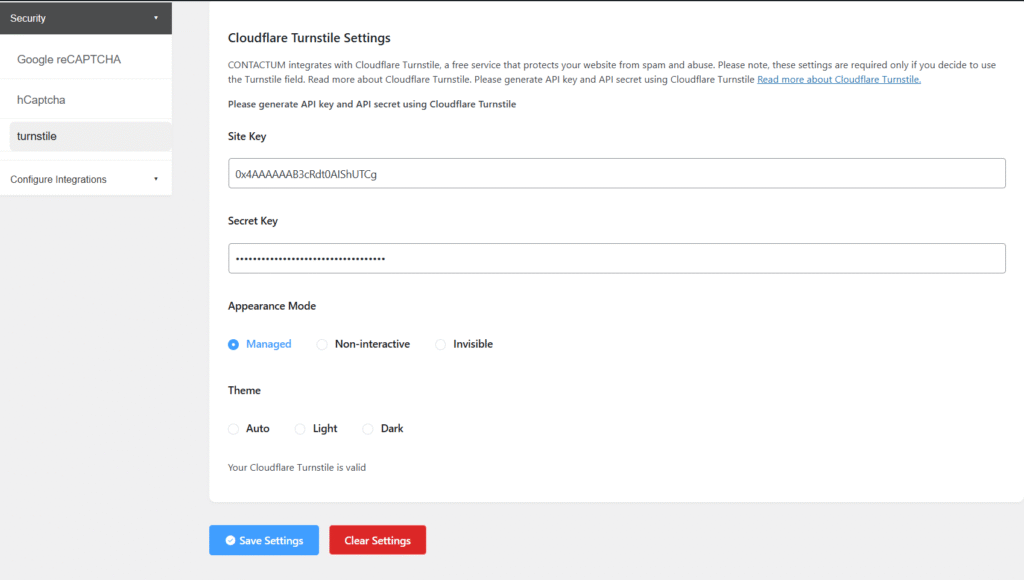
First, navigate to Settings from the Contactum menu, open the Security tab on the left sidebar, and select Turnstile.
You will then need to enter the Site Key and Secret Key from your Turnstile account to complete the setup.
Get the Turnstile Site and Secret Key # #
How to Get the Turnstile Site and Secret Keys
To obtain your Turnstile Site and Secret Keys, follow the steps below
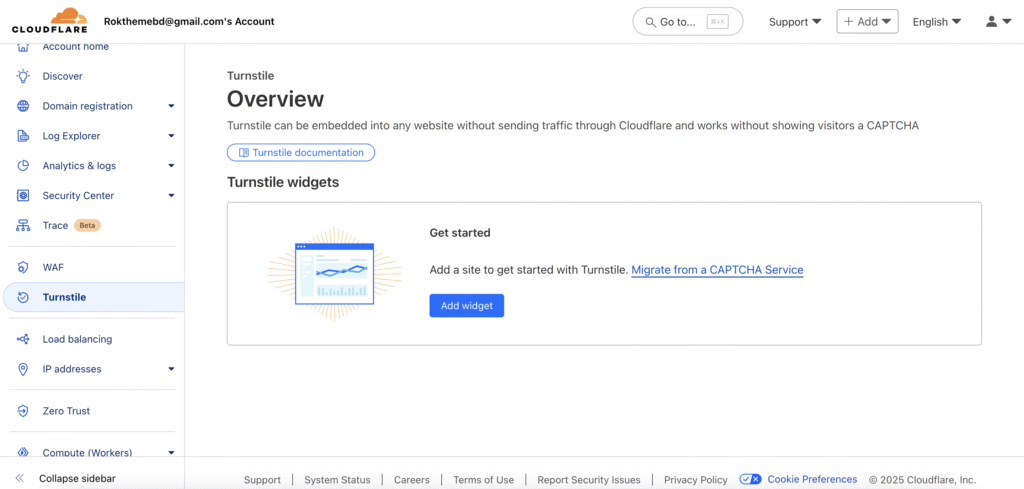
First, log in to your Turnstile account, go to Turnstile in the left-side menu, and click the Add Widget button.
If you don’t have an account yet, you can sign up here.
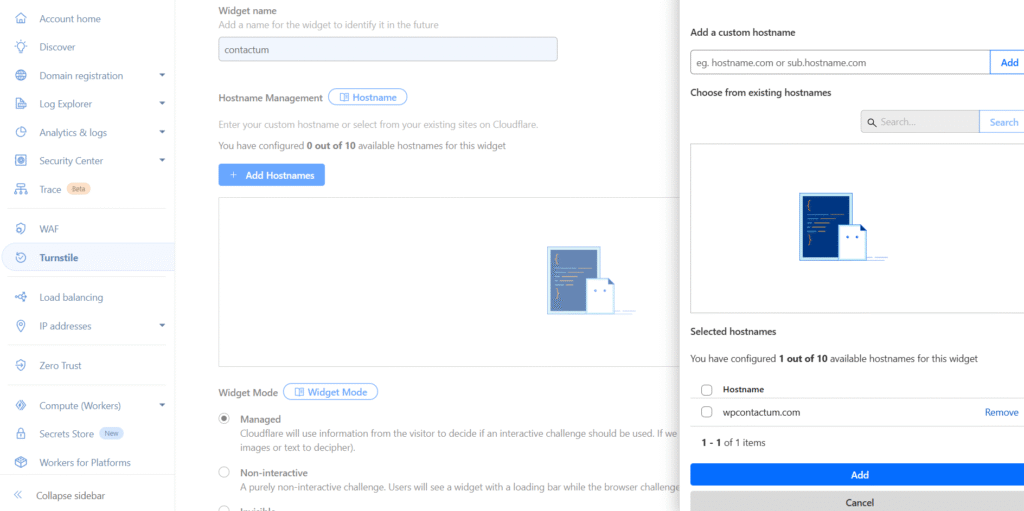
Now, put a Name to identify your website in the future and enter your website/s address using the + Add Hostnames button to register your domain for Turnstile verification.
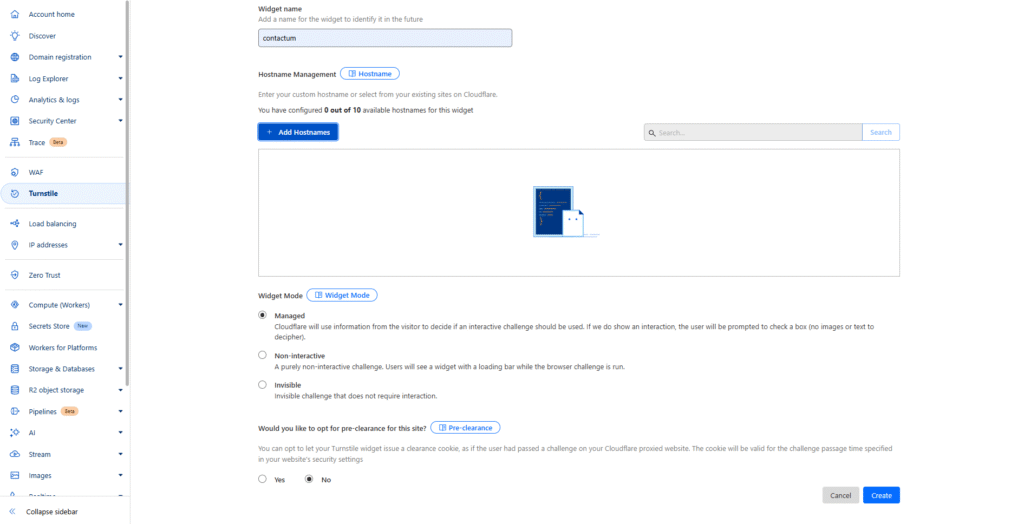
Next, type your site domain in the Add a Custom Hostname field and click Add.
Your domain will then appear under Selected Hostnames, which you can remove anytime if needed. Click the Add button below to confirm.
Now, you can choose your Widget Mode and Pre-clearance according to your preference.
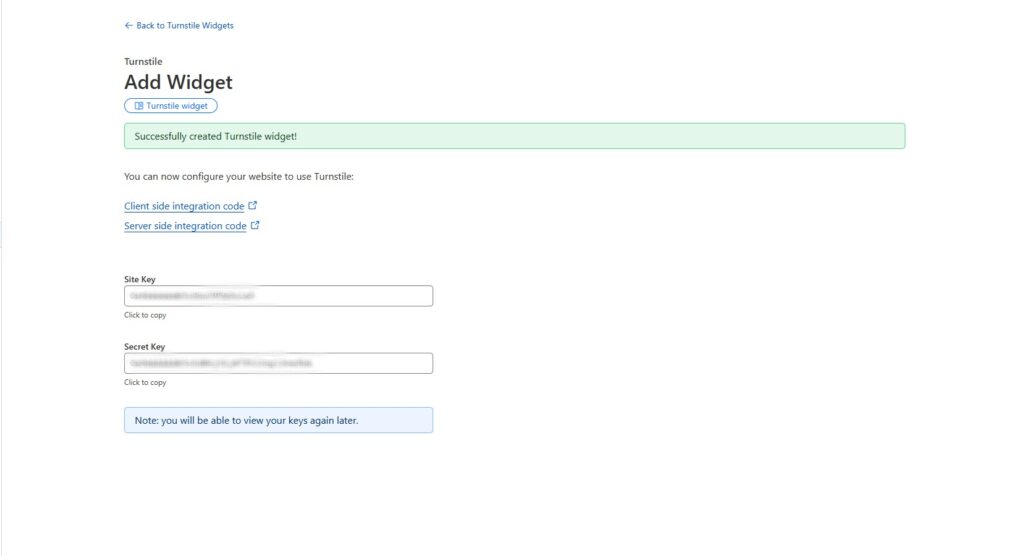
Once you are done, click the Create button, and the Site and Secret keys will be shown.

You will now see your Site Key and Secret Key. Simply click the respective buttons to copy them.